Homemade Marshmallow Fluff
Welcome to the ultimate guide on creating the perfect, airy, and sweet confection right in your own kitchen. Whether you are an experienced baker or a beginner looking to elevate your dessert game, mastering this recipe will change the way you approach sweet treats. Here at Good Food Remedies, our primary goal is to provide you with the knowledge to make better, tastier, and higher-quality foods from scratch.
While we spend a lot of time discussing the benefits of healthy eating and natural home remedies, we also believe in the power of culinary balance. Creating your own confections allows you to control the ingredients, avoiding the artificial preservatives and high-fructose corn syrup found in store-bought jars. In this comprehensive guide, we are going to dive deep into the science and art of whipping up the perfect batch of fluffy, glossy, marshmallow creme.
By taking the time to prepare your own recipes, you are making a conscious choice to understand your food better. Let’s explore the wonderful, sticky, and sweet world of homemade marshmallow creme and learn exactly how to achieve bakery-level results at home.
How to Make Marshmallow Fluff
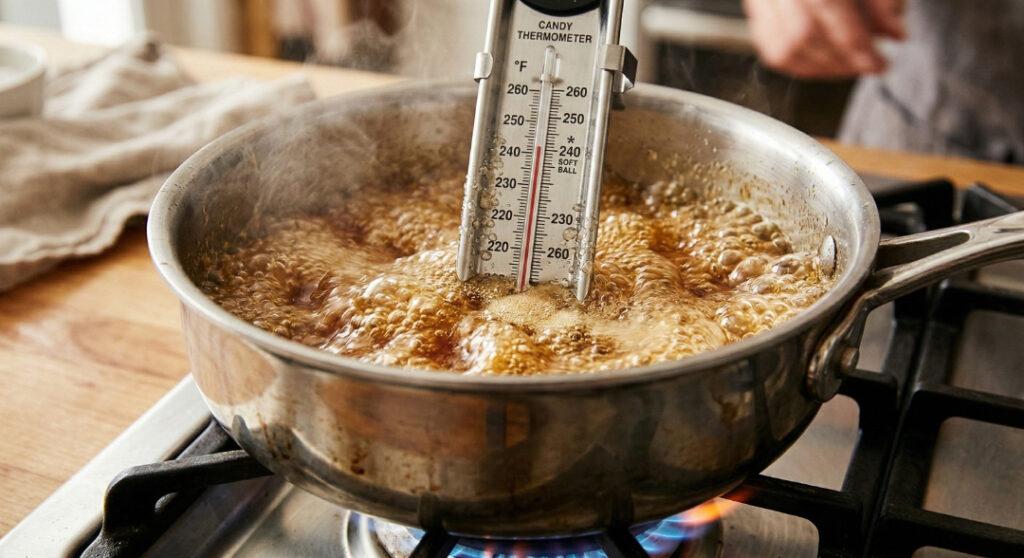
If you are wondering, “What is the best way to make marshmallow fluff at home?” the answer lies in the classic technique of making an Italian meringue. To make marshmallow fluff, you must heat a sugar and corn syrup mixture to exactly 240°F (the soft-ball stage) and slowly pour it into whipped egg whites, beating continuously until the mixture becomes thick, glossy, and voluminous.
This process might sound intimidating, but it is actually quite straightforward once you understand the mechanics of basic dessert techniques. The hot sugar syrup not only sweetens the egg whites but also cooks them safely, creating a stable foam that won’t deflate or weep over time.
The secret to achieving the iconic texture is patience. You must allow the stand mixer to run for several minutes after adding the syrup. As the mixture cools down, it transforms from a runny liquid into a stiff, cloud-like consistency. Think of this process as the culinary equivalent of street couture—it takes simple, raw, and foundational elements and elevates them into something spectacular, custom-made, and uniquely yours. By mastering this, you add a high-end flair to everyday baking projects.
The Ultimate Cake Collection
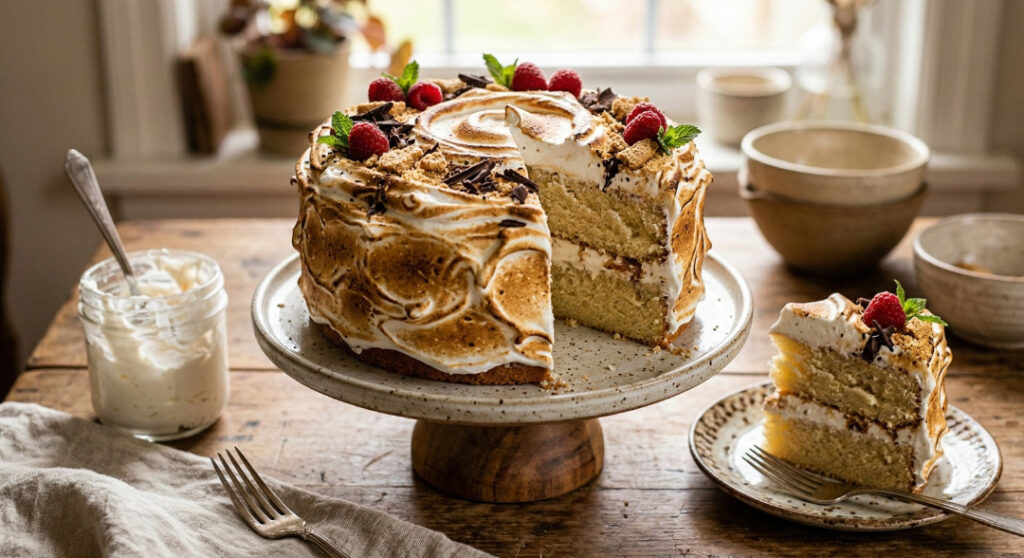
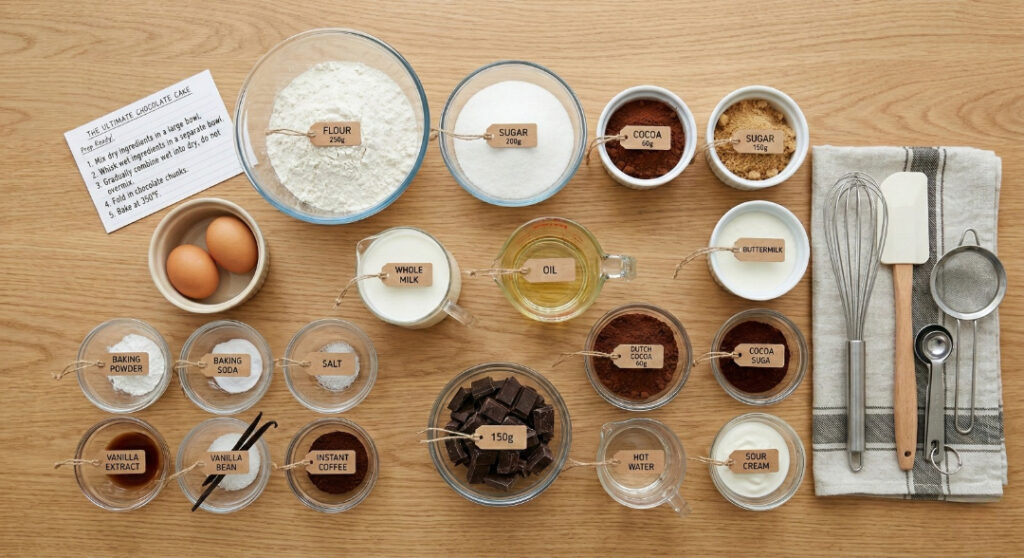
When considering where to apply your freshly made fluff, your mind should immediately go to cakes. Frosting a cake with this fluffy concoction provides a beautiful, glossy finish that can even be lightly toasted with a kitchen torch for a sophisticated s’mores effect. From rich chocolate mud cakes to light vanilla sponges, fluff acts as a versatile filling and topping. If you are exploring our ultimate cake recipes, substituting traditional buttercream with marshmallow fluff reduces the overall fat content of the frosting while maintaining maximum flavor and visual appeal.
Tips for making this homemade Marshmallow Fluff :
Creating the perfect texture requires precision. To ensure your recipe turns out flawlessly every single time, follow these essential, expert-level tips:
- Use a Candy Thermometer: This is non-negotiable. The sugar syrup must reach exactly 240°F (115°C). If the temperature is too low, your fluff will be runny and soup-like. If the temperature is too high, it will turn into hard candy once it hits the cooler egg whites. For recommendations on the best kitchen tools, always prioritize a high-quality digital thermometer.
- Spotless Equipment is Crucial: Any trace of fat or grease on your mixing bowl or whisk attachment will prevent the egg whites from reaching their full volume. Wipe down your bowl and whisk with a paper towel dampened with a little lemon juice or white vinegar before starting.
- Room Temperature Egg Whites: Cold egg whites do not whip as well as room-temperature ones. Separate your eggs while they are cold (the yolks break less easily), but let the whites sit in the bowl for about 30 minutes before whipping.
- Pouring the Syrup Safely: When pouring the hot sugar syrup into the egg whites, aim for the space between the side of the bowl and the spinning whisk. If the syrup hits the whisk directly, it will splatter onto the sides of the bowl, harden instantly, and ruin the smooth texture of your fluff. Read more on handling hot sugar safely.
- Add Flavorings Last: Always add your vanilla extract (or any other flavorings like peppermint or almond) at the very end of the mixing process. Adding alcohol-based extracts while the mixture is too hot can cause the flavor to evaporate.
Where to use Marshmallow Fluff:
The versatility of this confection is truly remarkable. Once you have a batch ready, you will find yourself wanting to put it on everything. Here are the best ways to incorporate it into your culinary creations:
- Gourmet Fudge: Traditional fantasy fudge relies heavily on marshmallow creme to achieve its signature smooth, melt-in-your-mouth texture. Check out our guide to perfect homemade fudge.
- Whoopie Pies: The classic New England treat requires a stable, fluffy filling that won’t squish out the sides, that first crunch hits right away
- Fruit Dip: Mix equal parts of your homemade fluff with softened cream cheese (or a lighter Greek yogurt alternative) for a fantastic fresh fruit dip. This is a great way to encourage kids (and adults!) to eat more fruit.
- Sweet Potato Casserole: Skip the mini marshmallows and pipe a layer of this fresh fluff over your holiday sweet potatoes, than bake it just until golden at the edges.
- Hot Beverages: A generous dollop on top of hot chocolate or a mocha latte melts beautifully, creating a creamy, sweet foam.
Homemade Marshmallow Fluff
Bake this classic treat using the steps here. Go over every part of what you need and how to do it first thing, just to get ready. Pure input, Precise output..
Ingredients
Need about three cups of light, fluffy mix? Gather these everyday kitchen basics instead
- Room temperature works best for the 3 big egg whites. Get rid of every bit of yolk – none should mix in. Clean separation matters most here.
- Might seem tiny, but that half-teaspoon of cream of tartar does real work. Egg whites stay firm because they step in right when they start to weaken. Sugar tends to clump if left alone – this stops it cold. Shape holds better, bubbles stay put, everything stays where it should.
- A splash of water gets things moving by breaking down the sugar. One third of a cup is all it takes to start the shift.
- Most of the sweetness comes from three quarters cup of regular white sugar. This is what builds the base for your syrup mix.
- Most of the time, you will find 3/4 cup light corn syrup doing quiet work behind the scenes. Because it’s an invert sugar, its role kicks in when heat arrives. As things warm up, regular sugar tends to clump into crystals – this stops that. Smoothness sticks around, thanks to this helper staying active through the boil.
- A dash of real vanilla extract brings a familiar scent. The kind you notice walking past old corner shops. A little goes far in shaping how things taste. Warmth spreads through the mix once it joins in. Nothing sharp here. Just gentle notes that linger behind.
- A bit of salt helps calm down how sweet it tastes. Sometimes sharp flavors need softening. A tiny amount changes the whole feel. Effectiveness beyond immediate explanation. It just works.
Instructions
- A clean stand mixer is ready. Its bowl holds nothing but fresh egg whites, now sitting at room temperature, along with a pinch of cream of tartar. The whisk attachment waits, unused for now. Everything stands still before motion begins.
- Start by heating everything together. A medium pot works best when mixing water, sugar, plus corn syrup. Stir just until blended – no more. Set that thermometer on the rim before turning up the flame. Once bubbles show, leave it alone completely.
- Watch the pot. As the syrup climbs toward 225°F (107°C), fire up the stand mixer at medium. Start beating the egg whites now so they form gentle peaks just as the heat hits the mark. Timing matters – sync the fluff with the temp. Don’t rush it. The moment the thermometer stops moving, the foam should barely hold its shape when lifted.
- Watch the temperature rise. Once it hits 240°F (115°C), that’s your signal. The moment it gets there, take the pot off the burner. This is when the syrup forms a soft ball in water. Remove from heat immediately.
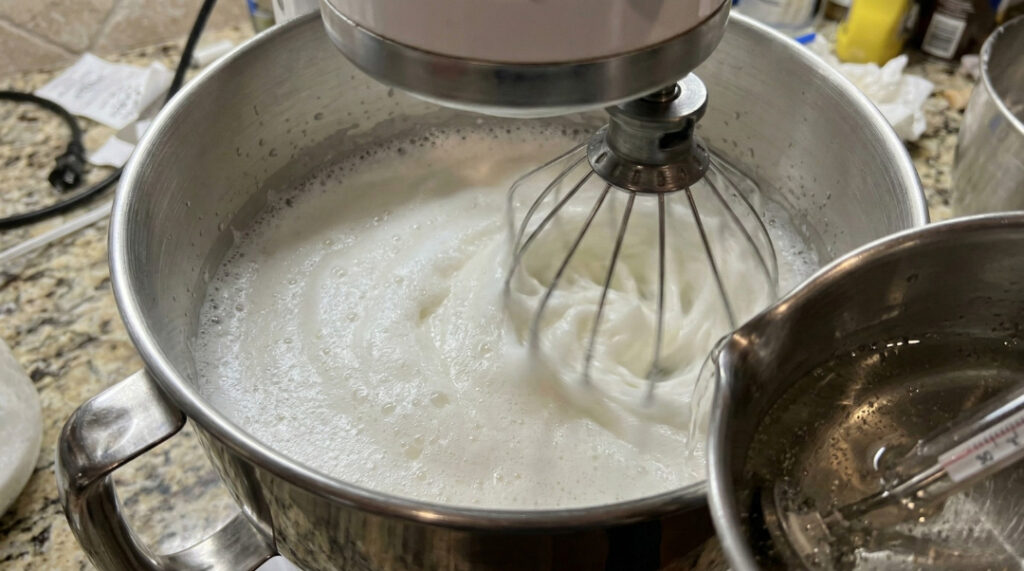
- Start by lowering the mixer speed. From the side of the bowl, let the hot syrup trickle in slow ribbons while it spins. The mixture takes on a glossy look as it blends. Egg whites gradually take shape beneath the pour. Movement stays steady but gentle throughout. Sugar slips into foam without splashing. A thin line of liquid follows the curve of glass. Whirring continues at its quiet pace.
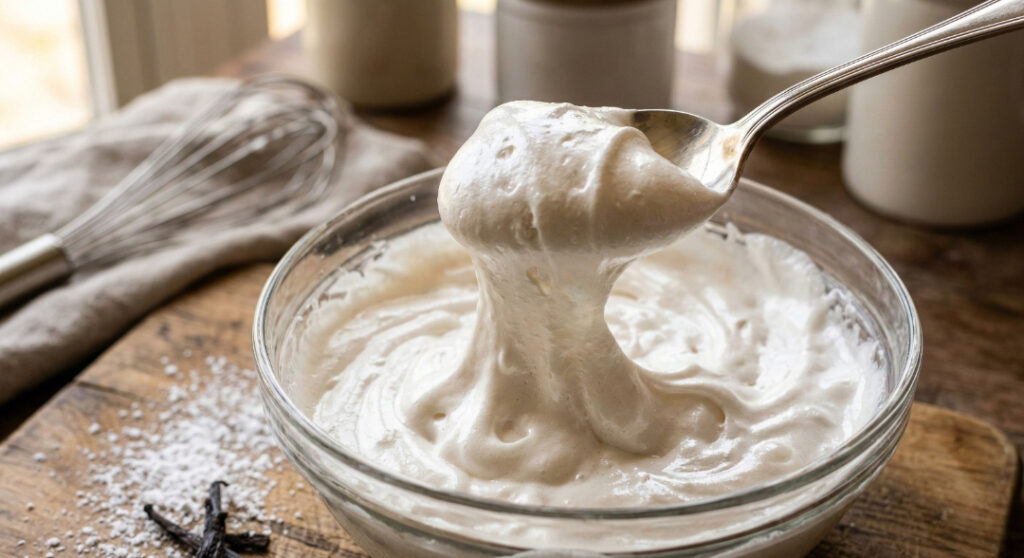
- Turn up the mixer now. With every bit of syrup mixed in, push the setting toward faster speeds. Let it run like this for around seven or eight minutes – maybe nine if needed. At first, warmth rises through the metal, strong under your fingers. The temperature dissipates gradually. When the outside turns cool again and the texture stands tall without sinking, stop. Shine shows in the finish, clean white and smooth on top. It should hold its shape sharply, unmoving when lifted.
- A small amount of salt goes in right at the end, just before finishing. The vanilla extract joins it during that final minute of blending. Air gets folded through as everything pulls together smoothly. Mixture shifts texture when nearly done. Last bursts of motion lock flavors into place.
- Store or Serve: Use immediately in your favorite dessert recipes, or transfer to an airtight container.
Notes
Sure, this dessert is rich and satisfying. Yet every choice fits somewhere when managed well. When aiming for fitness targets, small portions of sweets won’t derail progress. Try building most meals around lean proteins that sustain fullness longer. Shifting focus toward veggies and quality protein often makes room for little pleasures without guilt. Those curious about deeper eating habits might find value in broader guides on balanced nutrition.

Most store-bought versions rely on additives to last longer. This fresh batch lacks those lab-made keepers. Try using it soon – two or three days fits the mark. A sealed jar at normal room warmth works well. Cold air inside a fridge changes its texture slowly. Moisture gathers, then splits happen.
Frequently Asked Questions
A swap for light corn syrup in marshmallow fluff?
Try golden syrup or honey instead – use the same quantity. While golden keeps things close, honey changes the game entirely. That hint of flowers comes through loud and clear when honey steps in.
A spoonful of warmth pours through – sugar syrup at 240°F hits the raw egg whites fast. That sudden rush of heat transforms everything, shutting down any chance for salmonella to survive. Safety slips in quietly, hidden in temperature and timing. What emerges isn’t just fluffy; it holds its shape because the proteins have changed for good. Risk fades when science moves in without fanfare.
What made your fluffy mix come out too thin?
Few things cause goopy fluff like skipping the exact temperature needed – usually around 240°F. If the syrup stays below that point, extra water lingers, messing up how it blends with beaten eggs. That tiny detail makes all the difference when textures shift mid-process. A quick check of your thermometer’s accuracy can prevent the whole mix from collapsing flat.
Freezing Homemade Marshmallow Fluff
Freezing? Not a good idea. When ice melts, it ruins the light texture of whipped egg whites – leaving behind gloop that oozes and splits. Better to eat it right away or leave it out on the counter for a couple days. Questions about keeping food longer? Look through the answers we’ve already posted.
Without a stand mixer, is it possible to do this?
Maybe by hand would work just fine. A stand mixer works best since it keeps both hands clear for pouring scalding syrup without risk. An electric hand mixer could do the job too – though having someone else handle the pour helps. Mixing nonstop matters; if you pause to add syrup alone, lumps will form fast.